It may just be me, but when summertime rolls around, I notice an overall mood change. People seem to be much more lively when they’re out at the local farmers market or beach. While this summer may mean spending more time at home due to social distancing guidelines, you can still have fun with family and close friends, soaking up the summer sun.
Over the past few days, I have done a comprehensive search of some fun and inviting craft and DIY projects and activities, allowing us to turn our homes into hot staycation spots. Check out these unique projects designed to make your house feel homier. If you try any, let us on social by using the hashtag #SharpHome on Instagram, Facebook, and Twitter and tagging @SharpHomeUSA.
DIY Leaf Mandala Stained Glass

One of the best things about summertime is the never-ending sunlight coming through the windows, brightening your home. During these times, you may often open your curtains and windows, allowing the sun to come beaming in. A new addition and décor item would be a personalized stain glass you can hang, where the pattern will make a decorative shadow on the floor. While on Pinterest, I came across a fascinating DIY leaf mandala stained glass project from “Jojotastic.” It entails gathering a bunch of unique and natural leaves and turning it into a masterpiece. Let me walk you through it.
If you live near a wooded area or a pedestrian-friendly trail, safely head out and hunt for leaves. Find ones that may match your color scheme of ones that you believe have unique shapes and sizes. Once you’ve gathered a reasonable amount, take a breath of fresh air, and head back home to pick some more materials you will need to complete the project. Essential materials include double-sided tape, a clear hanging frame, and ideally a flower press.
Using the flower press, place the leaves in using tissue paper or cardboard. Tighten the buts and let the moisture dry out for about a week. This will ensure durability and prepare the leaves for design purposes. This part is the most critical as the leaves are the centerpiece of the craft.
The final step is simple and can be done within minutes. After waiting for the leaves to be ready for décor use, find a layout appealing to you using the frame. Play around with the leaves and try out different patterns. Finally, use the double-sided tape to secure the arrangement into place. Now, make your neighbors jealous of your newfound décor and enjoy your new light pattern.
Hose Storage


It is no secret the warmer weather calls for planting and gardening. After all, you are spending more time outside. While entertaining outdoors is undoubtedly a highlight of the season, a hose can often be an eyesore. Although it is essential for filling the pool or watering your plant’s, eye-catching and decorative storage options were hard to come by until now.

I was glued to my screen after reading about how “Shaunty 2 Chic” made a simple design that helps one from keeping their hose wrapped up on the ground and exposed to potential damage in their home garden. Using a few materials, they were able to find a solution to this manner, turning the eyesore to be an outdoor décor staple piece. This project requires a couple of large materials, but the result is worth it!
The first thing you will need to do is head to your local hardware store and grab a water hose holder, craft final, 4x4x8′ pine board, and a 2×6 and 1×4 scrap piece. The pine board will need to be cut in half, using one half for the main post and the other half for potential a second structure. Feel free to ask the hardware store to do the cutting to ensure it is done correctly and safely.
On the scrap piece of wood, cut two square pieces—one 5.5×5.5′ (from 2×6) and the other 3.5×3.5′ (from the 1×4). Use a permanent glue to place and center the smaller piece on top of the larger piece. Finally, glue the whole piece at the top of the pinewood.
Next, drill a hole through all the pieces making room for a craft final. Place it in using the directions from the manufacturer. Install the hose holder and spray-paint the entire structure to a color of your choosing. This gives you the creative freedom to make this piece your own. Finally, dig an 18′ hole and set your holder, wrap up the hose, and take a step back and look.
House Number Planter
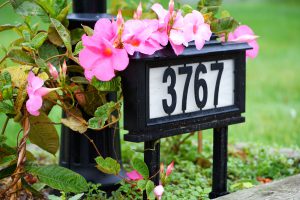
It’s all about curb appeal, and while each of us decorates with unique characteristics that define our homes, a house number is what makes each home our own. Recent trends show that whether you live at “14 Main St” or “56 Beach Blvd” can add a bit of personality to our yard. While looking for an afternoon summer project, “The Spruce Crafts” introduced me to the House Number Planter concept. This unique craft is perfect for placing on your front porch or near your mailbox. All you need is an old wooden crate, sandpaper, paint, house number, and some plants.
Before we can show off your house digits, the first step you need to take is to sand down the wooden crate using sandpaper. This will smoothen down any rugged or uneven surface and ensure that the next steps will go “smoothly” (see what I did there?). Wipe the crate down when you are done. Now is where you can add a sense of personal touch!
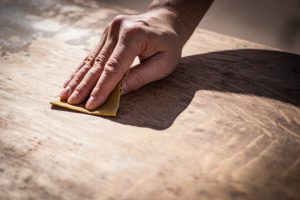

We will now be painting, and you can use any color of your choice. The cool thing about this project is that you can blend it and add it to any design scale. Using a paintbrush, paint all sides and insides of the crate. Due to the display, it is critical to get every corner. Use your best judgment to see if you need a second coat (although I believe one should be fine), and let it dry before the final steps.
Now we are going to add the digits or house numbers. You can do this however you like. One option is going to the local hardware store or favorite online retailer and purchasing them, and another is to use a different color of paint to paint on your basket. If you choose to buy numbers, check their size, and make sure they will fit. The more digits your house number has, the smaller (or larger) they may need to be. You can stick these on using the screws in the packaging or using adhesives (that may be a bit easier).
Finally, you are going to add a bit of life to your newfound creation. Add a plant of your choice to make your DIY design statement. Make sure to consider where you will be placing it in your home. You may want to consider not placing plants that require a large amount of sunlight in a shaded area. You create more than just another plant box, but a part of your home!
Paint a Doormat

Curb appeal and first impressions are everything, and that is still the rule when it comes to designing your home. When people first ring the doorbell, one of the most notable impressions is the doormat, as it serves as an entryway to your home. I had no idea that you could paint and create your doormat until now, I must admit, I am not the most talented artist. When I saw this “Better Homes and Gardens,” I realized there was no other option but to research this a bit further and sharing it with you.
Grab some lemonade, go on the back porch, gather your supplies. This is a great afternoon project. The essentials include a drop cloth, an unpainted doormat, 2-inch masking tape, and 3 types of spray paint. I recommend three shades of green (you will see why in a bit).
Set up the drop cloth on a flat surface and place the unpainted doormat on top. A simple beginner’s design that was used was a grass design. To mimic it, create a mountain-like tape design to act as a stencil. To keep the line steady, make sure that the tape is sturdy. Keep in mind that this step will be repeated three times, so place an appropriate amount.
Next, take one of the spray-paints and begin to spray carefully within the lines. To avoid over spraying, the second layer of tape may not be a bad idea. Use your best judgment to see if you need a second coat and let it dry. Once dry, mimic this step twice using a different paint color. Feel free to overlap to make to add a bit of detail.
Flip Flop Wreath

Growing up along the New Jersey Shore, there is an unwritten rule in the summertime, stating that you cannot wear sneakers and that flip flops are a must. As a staple in our local culture, flip flops signify a time of enjoyment and warm weather. Therefore, incorporating it into our everyday home décor is a perfect way to continually be reminded of the warmer weather ahead (or here to stay).
One thing that is amazing about the internet is the idea of always finding something to do, so when I saw the idea of a flip flop wreath from “A Day in the Life with TJ,” I knew I had to indulge in it by sharing with you all. Upcycling and finding new uses for products has been a trend in our society, and this idea checks off all those boxes. You can use old flip flops or head over to your discount retailer and buy a few inexpensive pairs. Here, I’ll get you started!

The first step in any project is gathering materials and setting a base. For this project, you will need around wreath ring (ideally wooden to hold the glue), pairs of flip flops, and a hot glue gun. The amount of flip flops is dependent on the size of the wreath ring. The typical wreath ring from major retailers often holds about eight pairs. Next, you will go on and paint the ring the color of your choice. While the ring’s exposure will be very minimal, it is tough to tell which parts you will be able to see once you complete the project.
After you let the paint dry, it is time to start critically applying the flip flops onto the wreath. It may be useful to pre-plan which color scheme, theme, or design you may want to use to limit error during assembly. Take one flip flop from each pair and space them apart on the circle wreath evenly. Glue the bottom of the flip flop to the ring allowing the top to expand the wreath. Next, take the accompanying flip flop in the pair and overlap them next to each other.
To add a bit of personality to the project, once all pairs of flips flops are assembled and glued, add some ribbons or flowers. Finally, hang your new masterpiece up, sit back, and admire it.
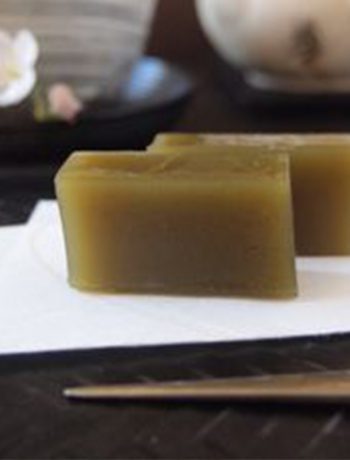
Mason Jar Pineapple Treat Holder
Whenever I have guests over, my number one goal is to make them feel comfortable. This could be leaving out treats for when they come to visit or giving them departing gifts when they leave. As the summertime is the number one season for entertaining, I am on my quest to find ways to combine these efforts more than ever.
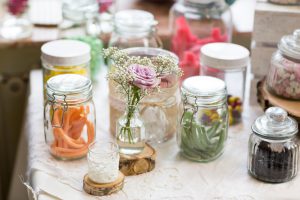
When I saw this mason jar pineapple that allowed you to put all different treats in from “Yesterday on Tuesday,” I found it quite appealing and wanted to find out more. This creative outlet is ideal for a centerpiece, party favor, gift, or any other purpose you could find a use for it. So, get into your artistic mindset and begin.
To create this, you will need to assemble a pint-sized mason jar, a yellow-colored spray paint, fine tip permanent marker, and a faux succulent (this could easily be found at your local dollar store or online retailer). Also, look for a circle or oval sticker you can use to cover while you spray paint, creating a window to display the inside of the mason jar. Place this sticker on one side, and thoroughly spray paint the rest of the jar. Remove the label once the spray paint is dry.
After a few minutes, use the fine point marker to draw “v” characters on the jar, resembling the texture of an actual pineapple. This will give it artistic detail and visual authenticity. Next, add some candy or treats to the jar. I would add peanut butter cups, but that is totally up to you.
Lastly, add the succulent and alter it to fit the mason jar. This will serve as a topping for the pineapple and as a lid for the candy. Overall, this is a simple creation that will excite you and your family and friends around you.
Jute Inspired Placemats and Coasters

I know, don’t worry. We have all went strolling around home décor stores and contemplated buying some eye-catching items for your home. “City Farmhouse” has opened my eyes to making fabulous creations for any dinner party or a quick drink. With the concept of round jute placemats, they have made spicing up your table setting very simple, yet it looks like a million dollars.
To complete the project, you will need 34″ feet of jute and a hot glue gun. That and a bit of patience will ensure and guarantee your newfound placemats and coasters. Make sure you practice building this on a flat surface. Apply glue to each the jute string and firmly press it to ensure that it will remain tight and stay together. Keeping it close will allow it to also be stable and create longevity for the product. It may not be a bad idea to head on over and look in your cabinet to grab a few of your favorite dishes to measure the size.

At this point, feel free to make it as big or as small as you want. I recommend creating sets in six, eight, twelve, or, however, many table settings or guests you anticipate on hosting. This project would also be ideal for a party favor as it is affordable, sentimental, and creative. Grab the jute and the glue gun, maybe turn on the radio, and get into a creative mood, transforming your table setting from basic to a new design approach.
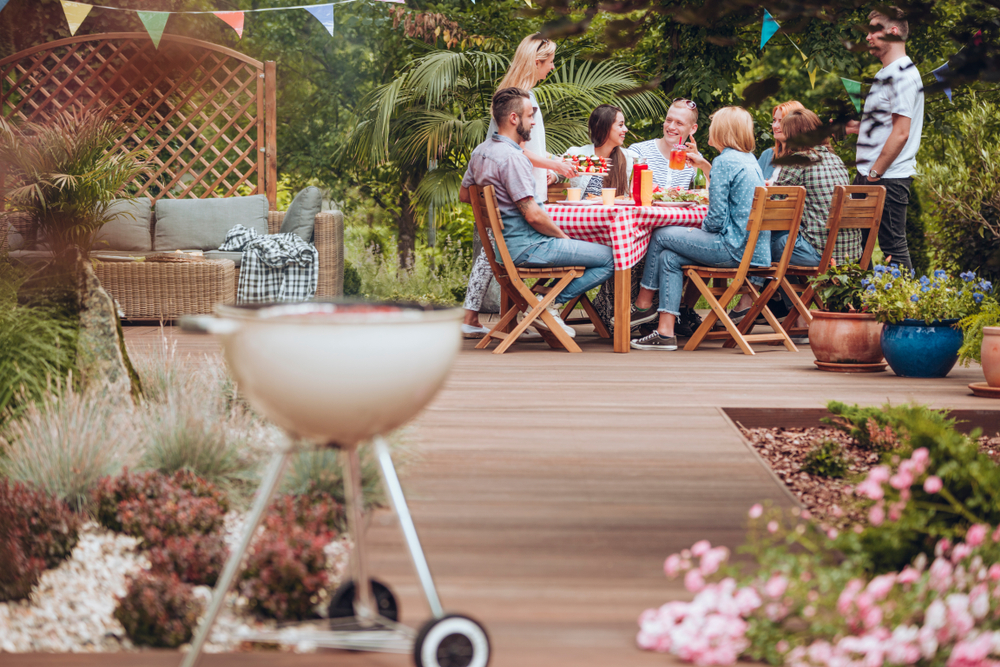
DIY Tic-Tac-Toe

Competition is undoubtedly increased from May through September, and while school is out and the kids are home, we all need to find ways to keep them entertained. While we can’t always turn to the pool or body of water, a family-friendly game is still in the midst. This do it yourself backyard game of tic-tac-toe inspired by “Tatertots and Jello” is the ideal activity to entertain the whole family. Parents have quoted this design concept as “finally something that helped me” and “super cute.” So, let’s put this together.
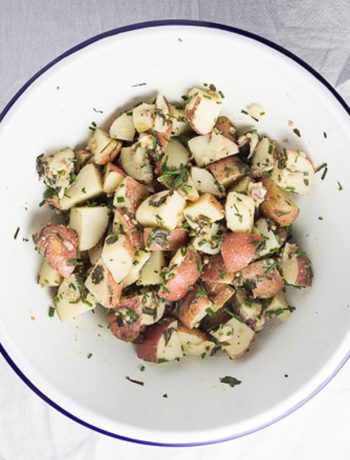
First, we are going to need to assemble a 14×8″ board, a stain or paint (to a color of your choosing), a secondary paint color (for the tic-tac-toe board), sealer, 10 large rocks, and a bowl. Take the large board and color it to your liking. Maybe you could choose a color to tie into your backyard design theme. A design is encouraged if you want to tap into your artistic skills and are up for the challenge. Next, use a ruler to trace a tic-tac-toe board and paint over it with the other paint color. It is encouraged to make each box the appropriate size where the rocks fit into it.

Next, take 10 rocks and separate them in half. Use leftover paint and paint an “X” on five rocks and an “O” on the other five. Finally, use a sealer on the mainboard to tighten it up and get ready to play. Place the rocks into a bowl. Then invite your friends and family over for a barbeque and some friendly competition.
The game is ideally played between two players. One player is assigned the “X” and the “O.” The objective of the game is to take turns to get three in a row. Strategic decision-making is key to a successful win, as well as friendly competition. Have fun!
Key Wind Chime

I have this drawer in my kitchen (okay, it’s a junk drawer, shh), and in it are a bunch of keys that I have no idea where they belong to or which they access. Instead of moving through them to get a pen or having them just sit around to take up space, I thought about how to upcycle them. While surfing the internet, I found a cool craft idea and design from “Best Laminate,” calling for a DIY key wind chime. This project is comprised of a bunch of different keys of all different shapes of sizes and is ideal for hanging on your front porch or back deck. Whether you are using it for a sound or tracking wind patterns and weather (especially during a thunderstorm), this less than 30-minute activity is definitely worth a try. Here is how you get started.
First, assemble an array of keys. The amount is up to you, and if you’d like, grab some paint and give them a splash of color before assembly. You will also need to grab a fishing line or heavy-duty string, scissors, clear spray paint, colorful beads, and embroidery hoops. Next, use the clear spray paint to make the keys shine bright and clear them off. Before we go to the next step, let them dry. Next, take a piece of wire and tie each key to the length of your desire. Follow this step for each key. I recommend that you try and tie them all within similar heights of one another. Another cool tip is to add beads to the wire once to tie the key. Tie it into the color scheme of your backyard to tie it in or use unique colors to make a statement piece.

Using a double not, tie each string onto the embroidery hoop’s inner hoop and spread it out as you please. Note that it may be best to work on a flat surface as it can reduce the chances of knotting. At this step, you may also decide to change the length of the strings. It may be a good idea to step outside and see where you will hang it so you can take the location into account.
Once all keys are in their ideal places and spread out, apply the outer hoop and tighten it to ensure that it stays in place. To make it a bit more durable, use a bit of glue. Lastly, cut off three long lengths of fishing wire folding each in half. Loop each string around the hoop, creating a triangle at the top and tie the ends together. Wala! Hang it up and let the compliments from neighbors begin!
Color-Block Concrete Planters
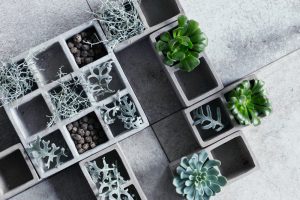
Plants and flowers supply a splash of color and personality into any outdoor space. A great supplement to these pieces is the planters. I have walked in many home and garden centers and saw some planters sell for hundreds of dollars. While I like a beautiful and groomed backyard, I don’t want to break the bank and save a penny when I can. This industrial and geometric painted concrete planter “Better Homes and Gardens” introduced me to is durable, eye-catching, and will serve as a staple piece for any area.
Grab some concrete blocks, masking tape, exterior paint, paintbrush, and plants.
The exciting part of this project is that you can make it your own, including the designs. Use the tape to create and tape off each section you would like to make a different color. It may not be a bad idea to brush off and clean the block before applying the tape and paint to avoid bumps and mistakes. Once you apply the tape, firmly press it down to make sure that it is secure. I recommend using a sticky note or a pencil to write which color you plan on painting each section. Consider your backyard theme and design goals when picking paint colors.
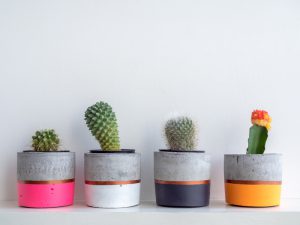
Next, apply the exterior paint to the designated section and space you have pre-determined. Paint up to the edge to get the straightest line possible. Now comes the satisfying part of removing the tape and watching the lines form. If you are satisfied with the look, you can jump right into placing the plants into the holes. However, if you are thrifty with a paintbrush, you can use your talent and paint a design on the blocks. Whether it is sunflower or a beach, it is totally up to you!
Lastly, you can place the planters in any order you like in small containers and then place each box in the block’s holes. Leave a bit of room for drainage and place wherever you please. Grab your watering can and enjoy it!
As the weather gets warmer and the sun starts to shine brighter, try some of these do it yourself and at home crafts to spruce up your yard and the inside of your home. #SharpStayAtHome