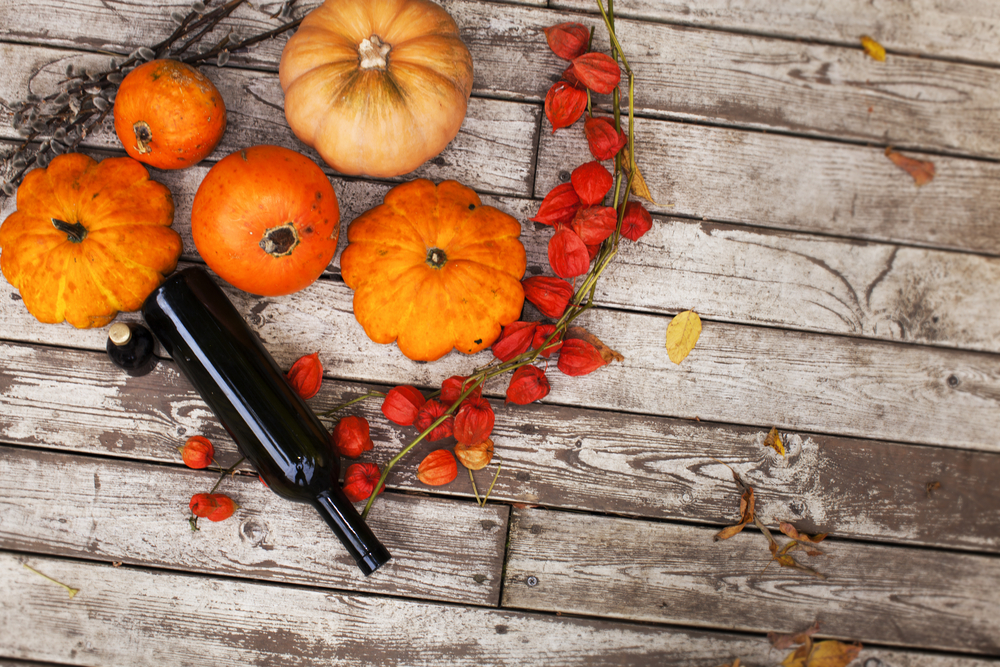
My home is like my sanctuary. Every season I like to change up each room inside my house, adding timeless pieces. For many, our homes have been serving as an office, classroom, vacation destination, and everything in between this year. While spending more time at home, why not spend a little time making your pad look Pinterest worthy? I’ll walk you through it.
Over the past month, I have been looking for ways to spruce up my home and make it fit the fall vibe, bringing light to the season and giving it a festive feel. Throughout social media and across many design boards, I have found five amazing design tips, including DIYs and simple ideas. Most importantly, ideas and projects you can complete on a budget.
What is special about these projects is that most of the accessories and supplies needed can be found at your local dollar store or discount chain retailer. Many think that to have a design-centric home you need to spend thousands of dollars, while that is the opposite of the truth. In fact, you can spend very little and make your home look like it’s in a magazine.
While these cool tips and design hacks sound amazing, I want to see what they look like in your home. Connect with us on social using #SharpHome on Instagram, Facebook, and Twitter so we can see how these design ideas make your home more decorative.
Corn Candles
When I was 14 years old, one of my first jobs was working on a farm near my town where they offered an array of fall entertainment. One of the activities was a corn box, where there were a bunch of pieces of corn for the children to play in. This makes me think back to the family-fun and the festive fall season whenever I see corn. So when I saw this project, I thought what better way to start off with this awesome craft.
While searching through Pinterest, I came across this awesome activity calling for a corn candle jar from “Passionate Penny Pinches”. This quick craft takes very little time to create and requires very minimum materials. It serves as a place to put your candles and the corn can be interchangeable, so the design can be used throughout the year with the best time being fall.
Head on over to your local dollar store and make sure to grab a few bags of popcorn (one to use and one to microwave and eat while you create it in your “Stainless Steel Carousel Countertop Microwave Oven”). This will serve as the corn for your creation. Also, make sure to pick up jute or ribbon, and candles and glass candle jars. To add a final touch, tie some ribbon around the jar for a little extra taste, giving it the real festive feel.
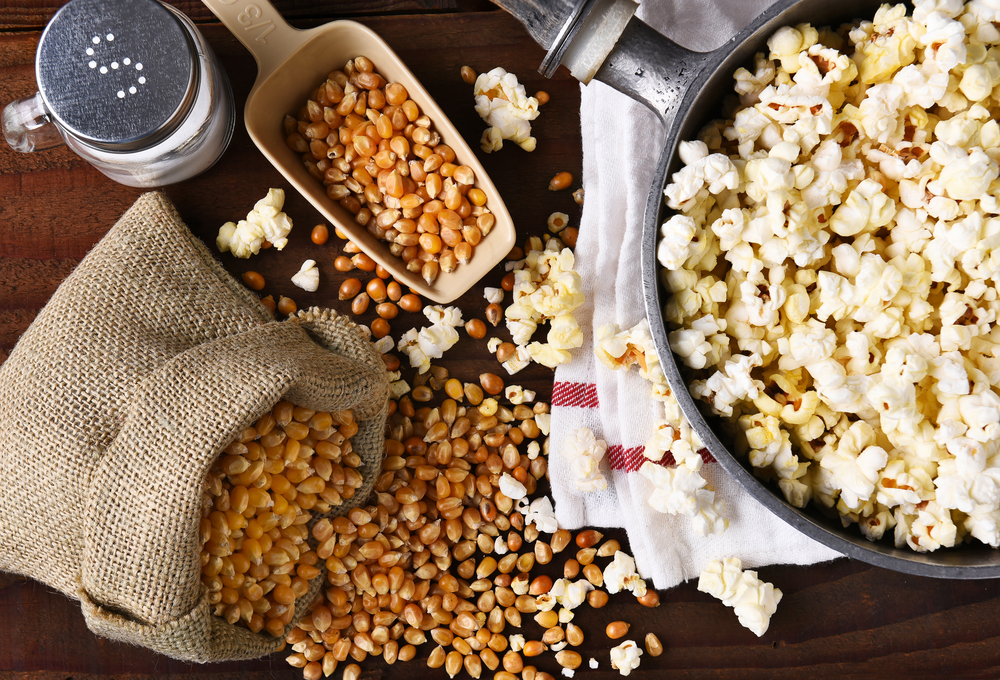
The process is straightforward and easy. Gather all your supplies, put the change back in your wallet (because it’s so wallet-friendly), and open them up. The first step is the grab the glass candle gar and opens the bags of unpopped popcorn. Next, pour the popcorn into the jars and place the candle on the top. I know, that’s it.
If you are looking to take it a step further or are trying to match a specific theme, for example, a blue for a beach house or black for modern, why not spray paint or add some coloring to the popcorn. Since the glass candle jars are see-through, you can add a splash of color to compliment your room.
Finally, find a nice space in your home to place the theme. This could be the centerpiece on a coffee or dining room table or a floating shelf. Just keep in mind that if you have small children, using battery-operated candles may be a bit better of an idea. Overall, I am sure that they will look amazing in your homes and I can’t wait for you to enjoy them and see how they look.
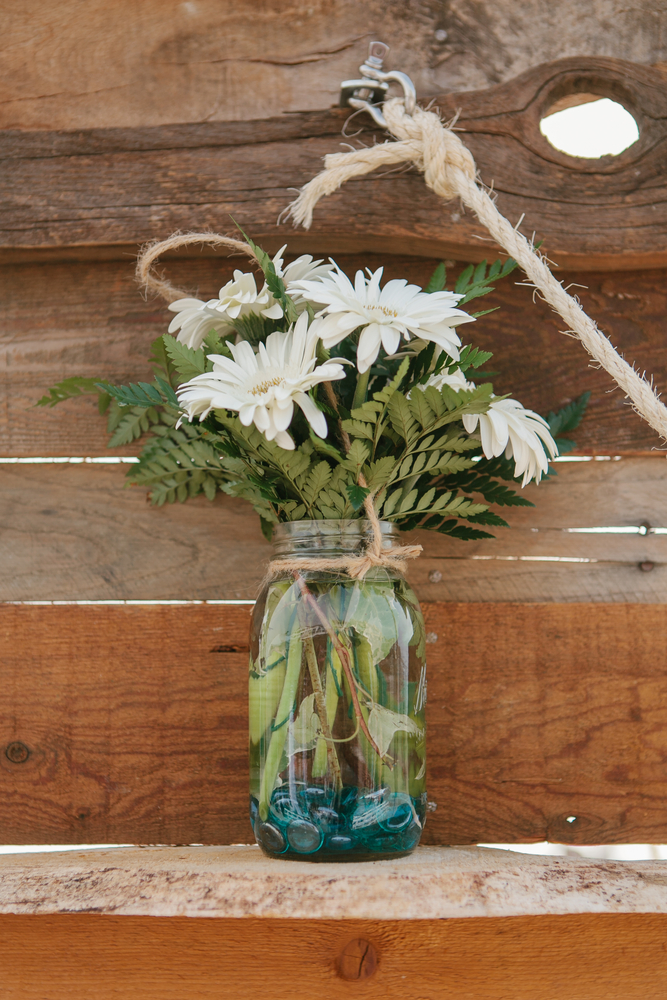
Mason Jar Vase
The rustic farmhouse design theme is seen on every television makeover show and is beloved and desired by many. Whenever you look up new interior designs through different magazines and online, it is the most popular and sought out trends, and I must admit I want in. Sure, I would love to have one of those home renovation crews come into my home and give it a full 180; however, I don’t have tens of thousands of dollars or a reality TV contract. The good news, you don’t need all that because you can still complete it without spending the big bucks.
What really makes a design theme complete are the décor items and the pieces. While tables are nice, it is what is on the table that attracts the eye. Mason jars are the best way to begin the process and ease into the process. This awesome mason jar vase concept from “The Farmwife Crafts” is easy to do and can be assembled very quickly. Let’s go through the process.
Head online and fill your shopping cart with acrylic paint. To really match your house or achieve your design goals, look around your home or at pictures, and pick your colors. Once you have those set, grab four mason jars, paintbrushes, a black sharpie, and ideal floral arrangements (matching your theme). These can be fake, and you can even paint them to really go with your design.
Ready for the steps? Let’s go!
- First, clean out the mason jars and remove the lids. Make sure they have no stickers and remains on the jar for a clean painting process.
- Next, paint your mason jars the colors you choose. Keep in mind that you may need a few coats to get the right shade of color. Paint the rings of the mason jar as well. For character, you may be able to choose a different color.
- Next, outline letters to create a four-letter word of your choice (ex: fall, love, etc.) using the sharpie. If you are having a bit of trouble-free handling, feel free to use a stencil. Fill them in with a different color paint than the jar.
- Finally, once dry, add in your floral arrangement. If you want a specific color, spray-paint them to match your patterns in your home.
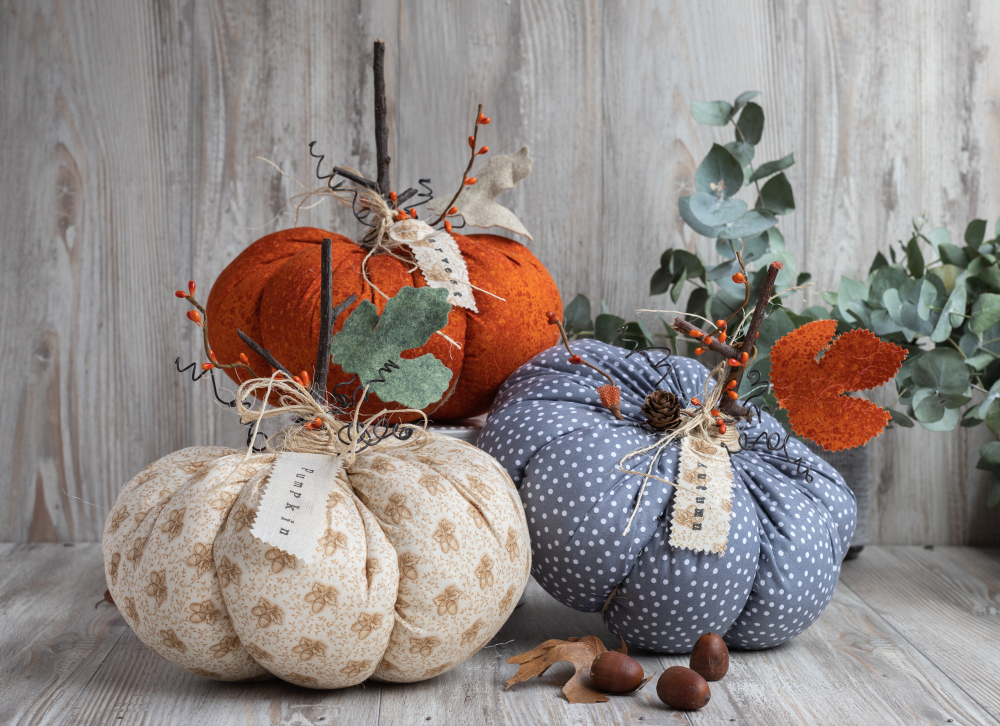
Toilet Paper Pumpkins
About 6 months ago, I remember we were told to stock up on a bunch of basic supplies and necessities such as foods, bottled water, and of course, toilet paper. This caused many to go to wholesale retailers and stock up. Now that supplies are going back up, many have stockpiled their pantries and their garages. Well, why not crafty with them while we are not using them. And if we need it again, we can always get it. Hear me out, toilet paper pumpkins.
I know how it sounds; however, it seems to be quite a popular trend on social media, and many have found success. I specifically found this concept from “Instru Pix” and found that the process is quite simple, especially since they highlighted that no sewing or knitting skills are required. All you need is a few supplies, some time, and a good attitude.
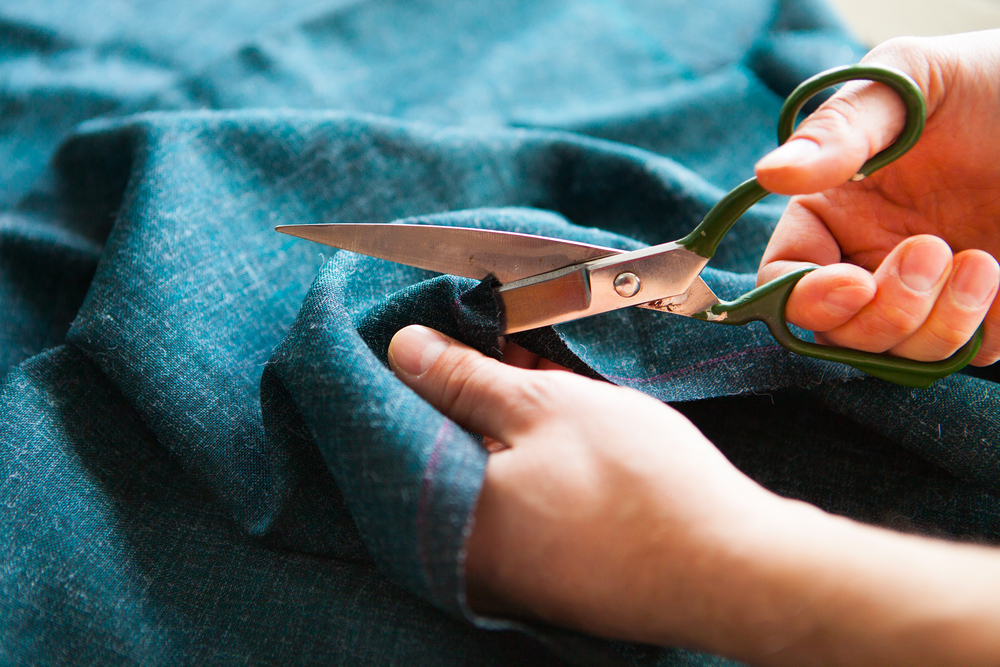
Here is what you will need, a large toilet paper roll (if you have a mega-size one that would be ideal) and an 18-20-inch piece of fabric (preferably square). Make it custom to your home. If you live in a beach house, there is nothing wrong with some anchored pumpkins. The uniqueness will give it a custom and rich feel. Also, there is no need to go out and buy fabric right away. Check your closet to see if you have an old shirt or clothing.
Next, head outside and grab a few small leaves from a nearby bush or a small tree. You may have to cut them down to fit to scale. For the stem itself, see if you can get a 4-inch branch. These materials give it an authentic feel. Don’t have access to these? No worries, you can substitute the leaves with green ribbon and the branch with cinnamon sticks (bonus, it will smell good too!)
Shall we begin?
- Start with rolling the toilet paper around about 10 times, taking 10 layers off. Be sure to crunch it up a bit and put it on the top of the roll, giving it a round top instead of flat.
- Once you have that, place the rounded toilet paper on top of the fabric. Grab one corner of the fabric and place it in the center tube of the toilet paper, and repeat. Keep repeating this process tucking each piece of fabric in.
- Finally, tie the ribbon or glue the leaves around the stick or cinnamon sticks and place it in the middle. Find a place to put your pumpkins and let the compliments begin!

Book Leaves Page Banner
While it can be so much fun refreshing and renovating to the next best thing, sometimes finding a classic feel and timeless design serves as a statement to your interior décor. This next design is an amazing way to incorporate some old books or magazines you have lying around a repurposing audience. Who knows, even if it is something that has meaning to you, putting the words on display in a unique way will add some personality to your space. Am I confusing you? It will make sense in just a second!
I am talking about building a fall banner with book page leaves. That’s right, the idea calls for incorporating beautiful orange and yellow leaves you find outside (or a fake one, shout out to the reading this under a palm tree). This concept comes from a blog post on “Sondra Lyn at Home,” and I became obsessed with it. Just something about it felt scholarly, and at homey, so I knew I had to share it with you all.
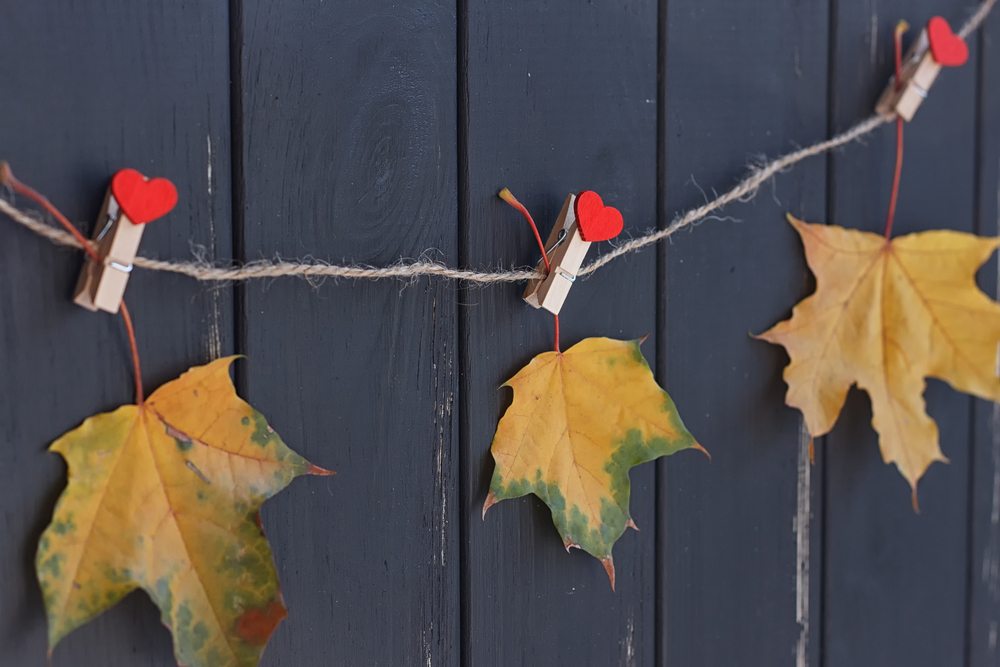
Let’s get what we need. Go throughout your home and make sure that you grab either a book (one of your favorites if you want to be sentimental or an old one you want to get rid of). You are only going to need a few pages. Next, go outside and pick up beautiful leaves and be gentle with them. If you don’t have any, you could always order some online (fake, obviously), but you will still get the same result. Next, find a large roll of twine or jute and some clothespins. If you can find antique ones or if you want to paint them, feel free as that adds a bit of character.
- The first thing you will do is gather all your materials and take out all of your leave. Take a piece of paper and make a stencil for each leaf, matching the design and shape of the leaf you are tracing.
- Using the stencil, cut out the page of the book mimicking the size of the leaf. Next, cut about a quarter of an inch from all sides so that the leaf will act as a border for the book page. Glue them on each one and repeat this step for each leaf.
- Allow each one a bit of time to dry to ensure that the leaves don’t break and that the book paper does not move.
- Finally, use the clothespins to hang them up on the string or jute and display it in your home.
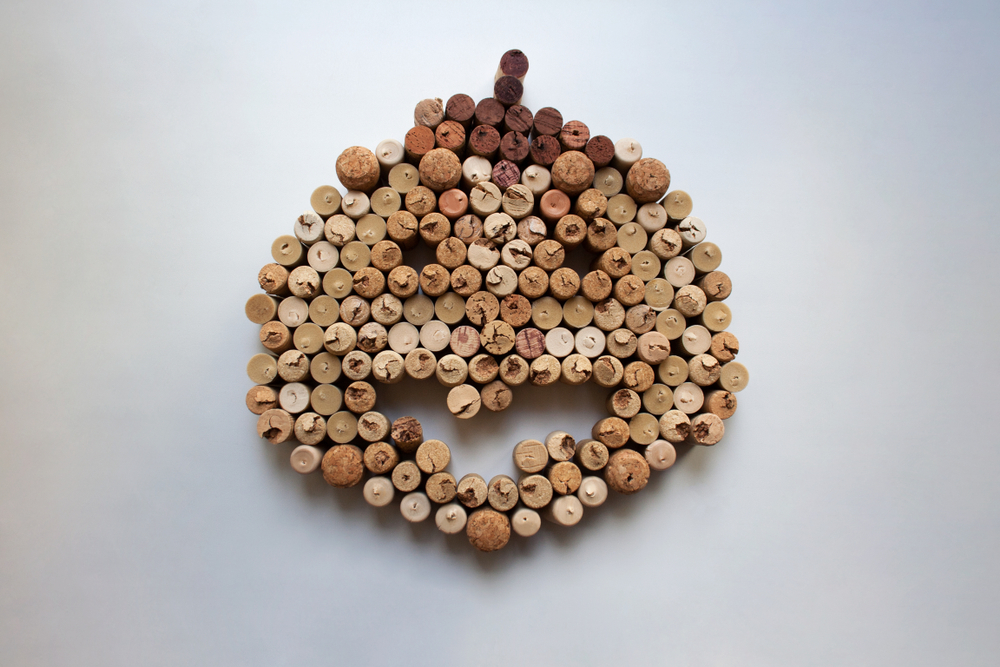
Wine Cork Pumpkins
This just got me excited! There is no better way to say. Growing up with older siblings and working in an Italian restaurant, I have always been around many bottles of wine, meaning we have a bunch of wine corks saved. In fact, we have a whole bin in our home of wine corks that just sit there and don’t get used (until now)!
Looking at this wine cork pumpkin activity from “Our Home Made Easy,” I just knew that this simple craft was the perfect way to repurpose and make use of all the wine corks you may have sitting around. Want to know something even better? This project takes about 20 minutes to complete, so you don’t have to devote a whole Saturday afternoon to complete this. This project was a no brainer to include in this fall décor roundup between the quick timing and the home-like feeling of wine corks.
The first thing we are going to need is (you guessed it, wine corks). To make the ideal pumpkin, it is recommended that you have at least 21 corks. Also, make sure to grab a paintbrush and a hot glue gun to ensure that they are stable.
- First, gather all your wine corks and glue three of them together, laying them down side by side.
- Repeat this process and glue four in a row on top, and then five. Once you reach five, begin to close the pumpkin shape by gluing four on top, and then three. You should have five rows with the bottom have 3 corks, the second row having 4 corks, the third row having 5 corks, the fourth row having 4 corks, and the top row having 3 corks.
- Once all of those are glued together, but one more on top serving as the pumpkin stem. Let the glue dry for a bit to ensure that all the pieces stay in place.
- Finally, once dry, you can begin to paint them; however you like. If you like the wine corks’ natural look, feel free to use a clear paint to make it shine. If you have a design theme in your house (you know the drill), paint it to match.
If you want to make a larger pumpkin feel free. Just keep in mind the depth of the wine corks may make it difficult for it to stand on its own, so it may have to lean on something. I am sure they will come out great!