
Summer is here and I am loving every second of it! While I love relaxing outside soaking up the summer sun, I’ve become decided to ditch the mundane routine (wake up, lounge by the pool, eat, go to sleep, and repeat) and add a little spice to my favorite season. Everyone is home for summer vacation and looking for something fun to do, but my favorite things are the ones that save a penny. Having some summer fun shouldn’t break the bank, and it doesn’t have to!
Looking for something new to do with the whole family but don’t know what to do? Stay tuned, because I found the Top 5 Family Fun Activities that are the perfect cure for boredom. If you try one of these awesome activities or want to share another one, feel free by connecting with us on social using #SharpHome on Instagram, Facebook, and Twitter.
Kite Flying
The breeze is great for helping you cool down, but it’s also great for flying kites! As a kid, my grandparents would take me to an open field, and we would fly kites for hours. We would take a trip to the nearest store, and I could pick out any kite I wanted (I usually opted for a character from a show I was obsessed with at the time). I always felt like those kites were missing something, and now that I look back, I know that they were missing something: they were just like all other kites other kids were flying. It didn’t embody who I was. If I were to design a kite at the time, it would have sparkles and other things that piqued my interest and reflect my personality. If you have extra time on your hands and want to personalize your own kite, I found an amazing tutorial! About a Mom recommends you gather:
- 1/4 inch round wooden dowel (36 inches)
- Twine or string
- Small handsaw (adult-use only)
- Lightweight craft paper (large enough to fit the frame of your kite)
- Scissors
- Glue stick
- Ribbon

- Craft paint and brushes
- Craft tube
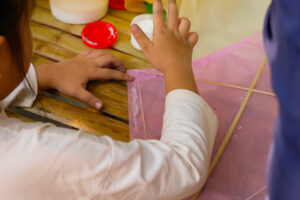
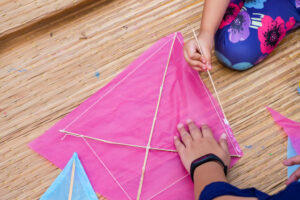
To construct the kite, start by using the small handsaw to cut 12 inches off the end of the dowel. Cut small grooves into the end of each dowel. On a flat surface, place the dowels in a cross shape. The horizontal dowel should be placed a third of the way down from the vertical dowel. To secure the structure, wrap a piece of string multiple times and fasten it with a knot. Inserting string into the grooves you created, create a frame by running the string around the outside. Once the frame is complete, tie a knot and cut any extra string. Cut craft paper to cover the kite frame with excess on each side (around 1 inch is recommended). Then, fold the excess over the dowels and attach it with glue.
After the glue dries, it is time for your inner artist to take over and paint! Once your design has completely dried, cut a piece of string 12 inches. Fold the piece in half and tie a loop at the end. Attach the loose ends of the string to the horizontal dowel. To construct the kite’s tail, cut six 4-inch pieces of ribbon and tie them onto a string measuring a foot and a half. Tie one end of the tail to the bottom of the kite.
To create the reel, tie one end of a long string around the craft tube, securing it by using a knot. With the remaining string, wrap it around the tube and tie the other end to the loop you created earlier on the kite. After the string is secure, it is time to take your kite outside and show it off!
This kite activity is a great teaching moment for kids: construction of the kite helps with fine motor skills, decorating allows them to express their creativity, and the kite in flight is the perfect time to talk about the physics of how a kite flies!

Summer Olympics
The Olympic Games have just begun! It’s always been a dream of mine to go to the Olympics as a spectator but given the circumstances and restrictions due to COVID-19, my couch isn’t a bad backup. Since we can’t go to Tokyo, we can bring Tokyo to us by hosting our own backyard summer games!
Whether you challenge your family members or team up with them to challenge your neighbors, you’re guaranteed to bring out the inner Olympian in everyone with this fun tournament. Try your luck in traditional events such as basketball, baseball, table tennis, or volleyball. If you’re looking for non-traditional events to try, Physical Kitchness had some great game ideas to get everyone involved such as fly swatter golf, beach ball race, and water frisbee fill.
Fly Swatter Golf
- Supplies (per team): 1 fly swatter and a plastic practice golf ball or similar
- Instructions: Decide a course of your desired length. Each team member swats the ball on the ground to the end of the course and back to the starting line where the rest of the team is located. The next team member can begin swatting when they receive the swatter. The first team to have all members complete the course wins.

Beach Ball Race
- Supplies (per team): 1 inflatable beach ball, 1 laundry basket
- Instructions: Two team members place the ball between their backs and lock their elbows. Once the ball is placed, members are not allowed to touch the ball with their hands. The pair must run to the end of the course and drop the ball into the laundry basket. If the pair is unable to make it into the basket, they must try again from the beginning. Once the ball is successfully dropped in the basket, the pair picks up the ball and runs to hand it off to the next two team members to complete the course. If there is an odd number of team members, the final person will complete the course by running will the ball between their knees. The first team to successfully complete the course wins.
Water Frisbee Fill
- Supplies (per team): 1 frisbee per team, 1 large container filled with water per team, 1 tall narrow container
- Instructions: The first player fills the frisbee with as much water as they want and runs to the end of the course where they must pour the water from the frisbee into the narrow container. Then, they sprint to the next team member to repeat the process. The team that can successfully fill the container with water to the brim wins. Create a list of events and get ready to compete. Who knows? Maybe you could win gold and bragging rights!
Create a Bird Feeder
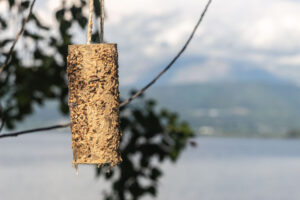
Even when I’m not exploring the wilderness, I’ve always felt connected to the outdoors when I see a bird flying by. I don’t know about you, but I strain my eyes most days looking at a screen. At the end of the day, I want to put my phone away and slip into an alternate life without the internet. My favorite way to do this is to reconnect with nature. When I don’t have the energy to go explore nature, I love when I can embrace what is already around me, such as the birds. I created bird feeders to put on my porch and lawn so I can see them within the comfort of my own house. Mom Wife Busy Life created a DIY bird feeder with three simple items!
- Empty cardboard egg carton
- Jute cord
- Birdseed
You will only need the bottom of the carton, so begin by cutting the top off. Then, run the cord through the holes on the underside of the carton. Determine how long you would like the cord to hang, cut the cord, and tie it into a knot. Place the birdseed into the carton and you’re ready to hang the birdfeeder outside. Enjoy the birds as they stop by for a quick bite!
Geocaching
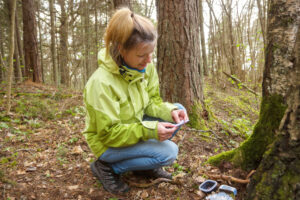
I’ve always loved a change of scenery and adventure. Being cooped up in the house most days, I try to get out as much as possible whether that’s going for a car ride with friends or tagging along on a quick trip to the store. Those activities only occupy me for so long until I am yearning for something else to occupy my time while still hanging out with the people I love. To combat my drive for adventure, my family and I recently starting geocaching in our town, and I am so excited to share this activity with you all!
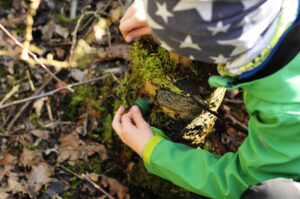
Geocaching puts a spin on the childhood game of Hide and Seek. Instead of looking for someone with no clue where they could be hiding, people hide containers called “geocaches” at different locations. But how do you know where these hidden capsules are? Easy – you download the app through Google Play Store or App Store. Once the app is downloaded and you have created your account, you’re ready to explore! The containers near you will appear on the app’s map, and then it is up to you to become a detective and search for the hidden capsules. Most geocaches allow you to document your discovery, so I recommend bringing a pen or pencil and a piece of paper to log the entries. Searching the area allows everyone to get involved and you could even turn it into an ongoing competition: who can find the most geocaches?
The best part about geocaching? You can do it wherever you are! It is a worldwide activity, so whether you’re in your neighborhood park or on a vacation in a different country, you can participate as long as your electronic device has access to your device’s GPS. It is a great way to get the whole family involved while enjoying the outdoors.

Backyard Bonfire & S’mores
The fun doesn’t have to stop when the sun goes down. Create your own backyard bonfire with a treasured treat: s’mores. I love sitting around the fire and roasting a marshmallow to perfection, but if you’re anything like me, then you probably end up a sticky mess after indulging in the gooey goodie. You must try out this amazing s’mores recipe from Eating on a Dime. This recipe puts a fun twist on a fan favorite. Let’s have s’more fun!
To make this sweet treat, you’ll need a few ingredients: a waffle or sugar cone, mini marshmallows, chocolate chips, and tinfoil.
Once you have all your ingredients, you’re going to put as many marshmallows and chocolate chips as you desire into the cone (I love to stuff it to the brim). Completely wrap the cone with tinfoil and place it on the fire for a few minutes until you’ve reached your desired texture.
For added flavor, trying mixing in additional ingredients. I love customizing mine with peanut butter and strawberries! This is the perfect opportunity to add candy or any other goodies you may have sitting around. Have fun experimenting and making it your own creation.
If you are tight on space or are expecting rain but still want to enjoy this summertime staple, you can make the s’mores on a grill or even in the oven!
Are you ready to try some of these activities and create some family fun memories? Use #sharphome and let us know. Have fun!