The cold weather is setting and you may be experiencing a small dose of cabin fever, it can be challenging to find some new and fresh recipes to satisfy our taste buds throughout the day. I know that I can always look forward to a tasteful creation straight out of the oven. While searching around for the perfect desserts, I came across a few recipes that were delicious and gluten-free, creating an overall healthier option. With more natural and mindful ingredients, the following step-by-step recipes are ones you can’t turn away from. From them, I hope we can both find a sense of enjoyment and benefit from sharing them with loved ones.
I invite each one of you to try one of these appetizing foods and tell us what you think by using the hashtag #sharphome on Instagram, Facebook, and Twitter and tagging @SharpHomeUSA. Now let’s look at some of those sweet treats!
Peanut Butter Brownies
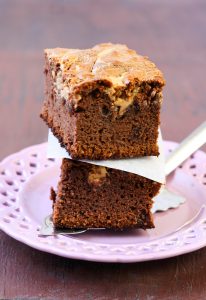 This recipe reminds me of the brownies my grandmother used to make for me ALL THE TIME when I was young. Peanut butter has always been one of my favorite ingredients to bake with. Whether it is in a peanut butter cup or a hearty sandwich, I always get excited to have peanut butter as a creamy filling. This first amazing creation I found from “My Gluten-Free Kitchen” is a peanut butter brownie that looks (and tastes) quite enjoyable. Whether you are making a batch for your family at home or just for yourself, this chewy and delicious snack is the perfect treat for any time of day.
Ingredients:
- All-purpose gluten-free flour blend (1 cup)
- Sugar (1 Cup)
- Semi-sweet chocolate chips (1 cup)
- Creamy peanut butter (1/2 cup)
- Butter or Non-Dairy alternative (1/3 cup)
- Firmly packed brown sugar (1/4 cup)
- Eggs (2)
- Baking Powder (1 tsp.)
- Vanilla (1/2 tsp.)
- Xanthan gum (1/2 tsp.)
- 9” baking pan
- Small bowl
- Electric Mixer
And now the countdown begins until you can call this wonderful desert all yours!
Instructions:
- Grab a small bowl and add in the flour, xanthan gum, baking powder, and salt. Whisk them all together and then set it aside when you are done.
- Use your electric mixer and in that bowl, add in the butter and peanut butter and beat it using the paddle blade. Mix it until it is light and fluffy.
- While in the process, add sugar and brown sugar to ensure a satisfying taste.
- Add in one egg at a time, beating them after one another.
- Next (my personal favorite), add in a bit of vanilla extract, beating it together.
- In three installments, add the flour mixture for a well-balanced creation. Beat it well until the creation is mixed.
- We are almost there! Stir in the chocolate chips
- Grab the 9” baking pan (preferably well-greased), and spread it throughout the pan
- Put it in your Sharp SuperSteam Oven at 350° for approximately 30-40 minutes. When it looks set in the middle, take it out, let it cool and enjoy!
The Softest Sugar Cookies
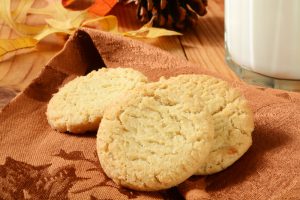
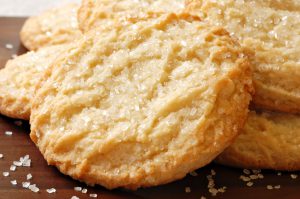
My obsession with sugar cookies goes back to elementary school from when my mother would always make them to celebrate my first day of school. Fast forward 15 years, whenever I walk into a grocery store and I try to buy mindful foods, it just so happens a box of sugar cookies in my grocery cart (I still am not sure how they get in there).
While researching these fantastic recipes, I saw “Frugal Farm Wife”, calling for a soft gluten-free sugar cookie. I screamed “SCORE” as the elimination of the unprocessed foods makes this recipe an automatic win. This creation is the perfect addition to any occasion and whether its game night or you’re watching a movie, this recipe will please your hunger (and your taste buds). Shall we begin?
Ingredients:
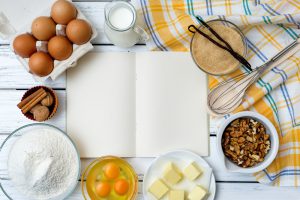
- Gluten-free flour mix (2 cups)
- Softened butter (1/2 cup)
- Granulated salt (2/3 cups)
- Milk (1-2 tablespoons)
- Xanthan Gum (1 teaspoon)
- Vanilla extract (1 teaspoon)
- Baking powder (3/4 teaspoon)
- Egg (1)
- Large Bowl
- Parchment paper
- Baking Sheet
- Optional: Frosting (why not?)
Instructions:
- First, you are going to want to preheat your Sharp Superheated Steam Countertop Oven to setting Bake/Reheat at 350°F.
- Grab a large bowl and combine the flour, xanthan gum, baking powder, and sugar.
- Once they are all combined and mixed, add your butter, egg, 1 tablespoon of milk, and your vanilla extract.
- Mix all the now made dough until it comes together. If you feel necessary, add a second tablespoon of milk. Your dough should be stiff.
- Next, squeeze your dough into a ball and roll it across parchment paper, making it around 1/4” and 1/3” inches thick.
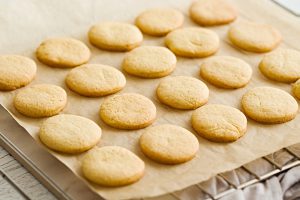
- Cut them into round or square shapes and place them on the ungreased baking sheets.
- We are almost there! Place them into the oven for 7-10 minutes. When the edges begin to brown, you know that they are about done.
- Remove the cookies from the oven and let them cool. When you feel ready, dive in!
Vegan Coconut Macaroons

I couldn’t keep on ranting about fantastic gluten-free dessert recipes without including an oil-free, vegan option. This planet-friendly cookie creation is a unique option for you to whip up in under an hour. I do not make a habit of making macaroons, but when I found “Nora Cooks” amazing vegan coconut macaroon creation, I couldn’t pass it up. I knew I HAD to share it with all of you. This chewy and toasty creation is one you will not want to miss out on and will bring delight to any situation.
Are you wondering how it is made? We will show you after you gather your essentials.

Ingredients:
- Full fat coconut milk (3/4 cup)
- Sweetened coconut flakes (14 ounces)
- Almond flour (1/2 teaspoon)
- Vanilla extract (1 teaspoon)
- Almond extract (1/2 teaspoon)
- Salt (1/4 teaspoon)
- Whipped aquafaba (4 tablespoons)
- Cream of tartar (1/4 teaspoon)
- Dairy-free chocolate chips (8 ounces)
- Small can of chickpeas
- Cookie sheet
- Parchment paper
- Measuring Cup
- Large bowl
- Medium bowl
Instructions:
- Preheat the oven 325° and line your large cookie sheet with parchment paper.
- Grab a bowl and scoop out the creamy white part from coconut milk into a measuring cup. Add liquid to make the measurement 3/4 cup.
- Add the coconut milk/cream to the large bowl. Put in the sweetened coconut flakes, almond flour, vanilla and almond extracts, and salt. Stir them all together in the large bowl.
- Regarding the Aquafaba, grab the can of chickpeas and pour the liquid from the can into a medium-sized bowl. Add the cream of tartar and beat them with a hand mixer for approximately 3-6 minutes.
- Take 4 tablespoons and add to the coconut mixture. Stir them until they are all combined.
- Form them into mounds using a tablespoon and place them onto the baking sheet approximately one inch apart.
- Bake them in the middle rack for approximately 23-25 minutes until the edges are toasty. Once done, place them on a cooling rack to dry.
- Finally, place your chocolate chips into a small bowl and heat them in 30-second increments, stirring in between, until melted. Once melted, dip each macaroon into the melted chocolate using a fork.
Mini Cheesecakes

This next recipe by “Mama Knows Gluten Free” for gluten-free mini cheesecakes looks almost rich and inviting not to include. The most attractive part of this recipe to me is the portion sizes, which makes them ideal for a dinner party where you could make everyone their own. When I showed this recipe to my mother, she immediately went out to the store to buy the ingredients for us to bake mini cheesecakes together.
Ingredients:
- Gluten-free graham cracker crumbs (1 1/4 cups)
- Sour cream (1/2 cup)
- Granulated sugar (1/2 cup)
- Cream Cheese (2 8-ounce packages)
- Eggs (2)
- Melted butter (5 tablespoons)
- Light brown sugar (2 tablespoons)
- Pure vanilla extract (2 teaspoons)
- Lemon juice (1 teaspoon)
- Cupcake muffin pan
- Cupcake liners (12)
Get excited because we are about to begin!
- Preheat the oven to 350° and grab a 12-cup muffin pan with cupcake liners.
- Next, we are going to make the crust. Take the crushed graham crackers and stir them with the brown sugar, and melted butter. Take approximately 1 1/2 tablespoons and place them at the bottom of each cupcake lining.
- Use a mixer to beat the cream cheese (room temperature) for approximately 1-2 minutes until it is fluffy. Add in the sour cream, eggs, sugar, vanilla, and lemon juice.
- Use a cookie scoop to divide the filling evenly among the 12 cupcake liners. Fill each one to the top.
- Bake for approximately 20 minutes, until they begin to brown. Once they are done take them out and let them cool for about 3 hours in the refrigerator. After taking them out of their cooling period, let them sit for about 2-3 minutes. Enjoy!
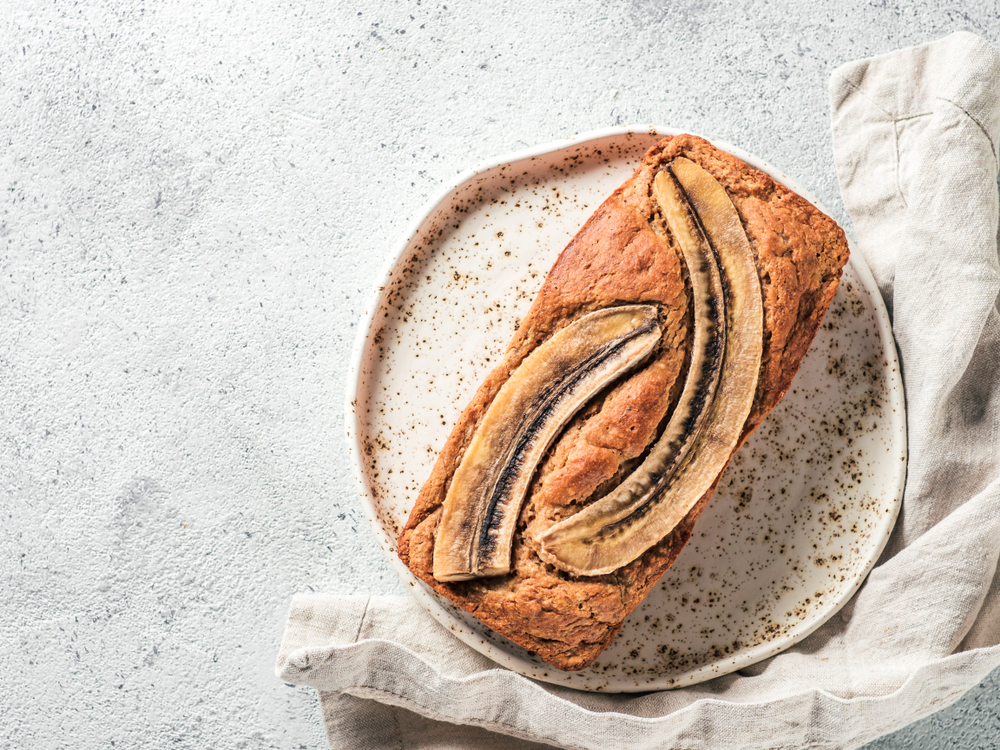
Banana Bread
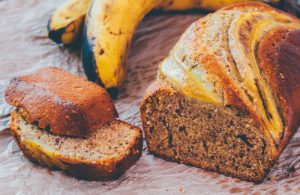
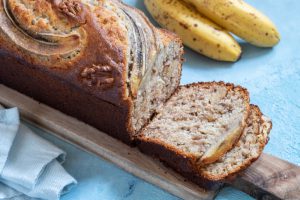
I never agreed with the saying “save the best for last”, however, some of you may see this gluten-free banana bread as one of your favorite creations. The first time I was introduced to banana bread was on a trip to Florida about 10 years ago. My family and I were in the downtown area and they were giving out free samples to those who walked by. I took one and can assure you it was love at first sight.
Since then, my aunt has been making it homemade, however, when I found a gluten-free option I was invested. This tender and simple creation from “Gluten-Free Palate” is one that I recommend that everyone try. We can’t wait for you to try it!
- Mashed ripe bananas (2 large bananas/1cup)
- Gluten-free flour blend (1 cup)
- Granulated sugar (3/4 cup)
- Avocado oil (1/4 cup)
- Dairy-free plain yogurt (1/4 cup)
- Eggs (2)
- Gluten-free vanilla extract (1 teaspoon)
- Baking soda (1 teaspoon)
- Salt (1/4 salt)
- Gluten-free chocolate chips (1/2 cup)
- 9×5 meat loaf plan
- Large mixing bowl
Let us take you through a short few steps, one last time!
- Preheat the oven to 350° and grease a 9×5 meat loaf plan. Set that aside and we will use it in a bit!
- Mix mashed bananas, oil, sugar, eggs, yogurt, and vanilla into a large mixing bowl until it is smooth.
- Once stirred, add the flour, baking soda, and salt. While mixing them, feel free to add the chocolate chips for extra taste!
- Grab the loaf pan and pour the batter, making sure to level it off.
- Place it in the oven and bake it for approximately 45-55 minutes. To test and see if it is done cooking, insert a toothpick in the middle, and if it comes out clean you are good to go.
- Take it out of the oven and store it at room temperature.
Are you ready to try some of these delicious gluten-free creations treats? I hope you enjoy them as much as I do. Feel free to tell us by using #sharphome. Enjoy!

