With back-to-school season in full swing, your microwave oven is necessary for survival. There are far more uses for your microwave than just piling food on a plate and pushing the start button. Microwaves are not just for reheating leftovers and boiling water; they can actually be a super-helpful tool for quick and efficient cooking — as long as they’re used properly.
While reheating in a microwave oven is simple, there are some well-known ground rules: don’t use traditional metal cookware in your microwave oven and keep odors away by cleaning the cavity of your microwave oven regularly. There are also the less-known ground rules that can make a significant difference in your microwave cooking experience, which we’ll highlight now.
Be Aware of Hand-Crafted Pottery

In full disclosure, I am a mug fanatic; I purchase handcrafted mugs regularly and yes I do use them all at one time or another. I rarely check to make sure my mugs are microwave safe, it is an afterthought for me. This isn’t ALWAYS an issue; some hand-crafted mugs work just fine in the microwave oven. But most of the time I end up scorching my hand on the handle of my cup.

However, if you don’t know the composition of the product, some hand-crafted mugs will get hotter than others. Some of them have more-dense and less-dense areas and may not heat evenly. Sometimes the connections – where the handle meets the outer-bottom of the mug – can get hotter than the rest of the mug.
Hand-crafted items with charming inconsistencies may be your go-to for a quick cup of coffee, but may not be well suited to microwave cooking. I would recommend leaving your handcrafted favorites out of the microwave oven to be safe.
Less is More with Cooking Spray
Everyone’s first instinct is to spray the inside of the mug with a TON of non-stick spray. Really, that only protects the bottom of the mug because of it all pools to the bottom. You will have better results of you less non-stick spray, and then use a silicone basting brush to spread it more evenly up the sides of the mug.

Sometimes, the non-stick spray isn’t ideal, especially when you’re making little mug omelets, morning scrambles, crust-less quiches. And sometimes cleaning up requires more effort than I am willing to devote on a Monday morning.
I would rather line the mug with microwave-safe plastic wrap and just a touch of non-stick spray, especially when dealing with eggs. But lining a mug with plastic wrap is also challenging. For a hassle-free solution to lining your mug simply:
- Find a tall drinking glass that fits inside your mug, without touching the walls of the mug.
- Flip the glass over and spread the plastic wrap over the bottom of the glass, making sure that you have enough to go up the sides.
- With the outside-bottom of the glass-covered, flip it over and place the entire glass inside your mug.
- Now the plastic wrap is all the way to the bottom, and you can simply peel down the excess plastic wrap off the glass, and affix it to the outside edge of the mug.
- When you remove the glass, it may turn the plastic wrap out like a sock, but being adhered to the outside of the mug, it is simple to tuck back inside.
- A little spritz of nonstick spray inside the plastic-lined mug is all you need for perfect microwave eggs. If you did it right, you may not even need to wash the mug when you’re done!
Pro tip: If you are minimizing fats and oils, you may want to consider a parchment cupcake liner inside the mug instead.
Microwave Meal Prep is Possible
Mug cooking gives you a great excuse for meal prep during the week. Start small with weekday breakfast. Start off by taking out 5 of your favorite mugs and a digital kitchen scale. Place the mug on the scale and zero-it-out with the tare feature.

Then begin to add your ingredients one at a time, writing down the weights of each for your calorie counter or macro-nutrient calculator. Cover with plastic wrap. Build yourself 5 perfect, little weekday breakfasts and have one every morning. Don’t do anything to hasten spoilage and don’t compromise on food safety.
Lentil Soup and Rice
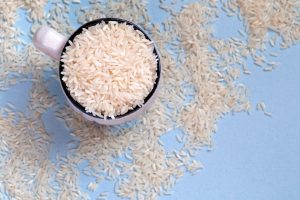
Use mugs to portion high-calorie items. Lentil soup is normally made in an enormous pot when you use up the whole bag of lentils, the same is true with rice. But you can make responsible portions of lentils and rice in a mug with no leftovers or opportunity to overindulge. If you live on your own as I do, this is the best way to avoid eating lentils for 7 days straight.
For the Lentils
- Rinse 1/2 a mug of lentils and soak them overnight in the mug.
- Drain the water, rinse and drain again.
- When you’re ready for soup, fill the rest of the mug with chicken broth and microwave.
For the Rice
- Fill half the mug with rice.
- Rinse and drain.
- Flatten the rice at the bottom of the mug and place your index finger, resting on top of the rice.
- Pinch of salt and fill the mug with filtered water until the water reaches your first knuckle (about 1 inch).
- Microwave uncovered, on high for 15-18 minutes and fluff with a fork.
Meal Prep Recipe Notes

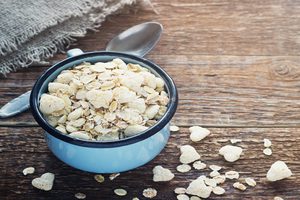
If you are doing oats or quinoa or other hot cereals, add the liquid at the last minute and microwave them that morning. Or add milk to a mug the night before and leave in the refrigerator for over-night oatmeal.
If you have a mug of diced vegetables and a pat of butter, add the egg in the morning, break the yolk and microwave immediately.
This is not the time or the place for uncooked meats. Pre-cooked meats should be fine.

