There is no doubt that Halloween is a special time of year. The spookiness of movies on TV, the candy, and the ability to tap into your creativity dressing up as your favorite monsters, characters, and more. I am usually not a big fan of scary costumes and movies, but something about Halloween really gages my interest and keeps me interesting while looking for a scare.
While Halloween gatherings with friends and families at school may be limited and school parties may be canceled, you and the kids can still get together and create some awesome treats resembling some of the best parts of the spooky season. Surprisingly, they are delicious and don’t take much work at all.
I have been searching the internet far and wide to find some of the perfect Halloween recipes for you and the kids to enjoy. Each one contains elements of traditional dishes, yet a splash of spookiness that will really get the whole family in the spooky spirit.
I am excited to see how you and your families enjoy them. Now I know it will be hard to keep their little fingers off all these awesome creations, but before you eat them, snap a picture and tag us using #SharpHome on Instagram, Facebook, and Twitter.
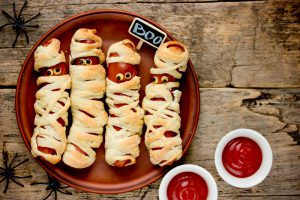
Mummy Dogs
Looking back and reflecting on my childhood, some of my favorite memories stem from Halloween activities. In a class or outside with friends, I recall having competitions with each other, seeing who could wrap each other with the most toilet paper to mimic a mummy. Nowadays, I could not imagine wasting that much toilet paper on a game but decided to reimagine the way to celebrate mummies this season. What better way than to do it with food?
That’s right; I am talking about mummy dogs. This simple and crafty creation from “Home Made Interest” can be made right in your Sharp Superheated Steam Countertop Oven. Perfect for a Saturday afternoon or a weeknight after school or work, this typical six serving creation can be completed in under 30 minutes. Also, I guarantee the kids will love being involved in the baking process. If you want to get a bit more creative, have the kids tap into their creativity slightly and even name the mummies. This could be fun and even make the prep process more imaginative.
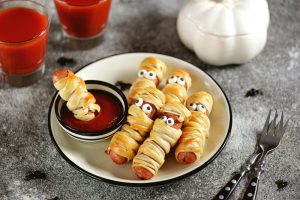
All you need is grab a package of hot dogs and a package of roll rough. One roll of dough should cover about 6 hot dogs, so if you want to make more, make sure to stock up on some more quantities. If you have tiny decorative eyes leave those on the counter; if not, take out a bottle of ketchup or mustard. You will see why in a bit!
- First, you are going to set and preheat your oven to 375° F.
- Next, crack open your roll package and unroll the dough, flattening it out. Make sure to press on the perforations so that it is one piece sealed together.
- Once the dough is laid out, cut them off into strips measured to be 1/4 of an inch. Keeping them thin is critical to get the look you are going for.
- Cut open the hot dog package and begin to wrap them in these strips. You could explain it to them just like they would wrap a mummy with toilet paper; they can wrap hot dogs with dough. The dough can overlap, but make sure that the whole hot dog isn’t covered so you can get the full mummy experience.
- Once you have your mummy dogs decorated, place them on a baking sheet, and put them in the oven for approximately 10-12 minutes. Once the dough is a golden brown and the hot dogs are warm enough, they should be good to take out.
- Lastly, remember those googly eyes I told you to take out? See if you can place them at the top end of one of the mummy dogs. If not, use some of the mustard or ketchup and place two dots to mimic the eyes.
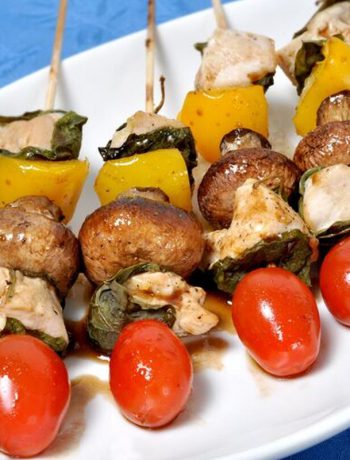
Ghost Kabobs
I guarantee when you go on the internet and search for creative Halloween treats, you get a bunch of links and blogs showcasing lots of tasty treats, but they can be pretty unhealthy. While this is the time of year centered around candy and junk foods, making sure there is a good nutritional mixture won’t hurt anyone.
If you are in search of the perfect snack, I discovered an amazing creation from down under! That’s right; I am talking about these awesome and quick ghost kabobs I found on “One Simple Pantry.” The weather is beautiful, and it is the perfect time to take go for a walk or play outside, so after working up an appetite, this may be the perfect way to cure your hunger and sweet tooth.

With no appliances, baking, or cooking required, this simple recipe is straightforward to assemble. Grab your keys and put on a mask to head to your local grocery store and grab some strawberries, melons, and 12-inch wooden skewers. To make it spooky, grab a black food coloring marker (you will see why in a minute, ha-ha). To diversify it, a bag of marshmallows is also essential.
While the marshmallows make the kabobs, feel free to swap out some of your fruits with others to meet your child’s nutritional needs, allergy restrictions, or even their personal preference. These are just suggestions, but make sure you add what you want. Perhaps bananas? Let’s begin!
- First, take out all your ingredients and supplies needed. Have the kids, or you, use the black food coloring marker to make little ghost faces on the marshmallows. This includes two eyes and a wide-open mouth represented by black circles (you know, a Ghostface). It may be a great idea to have them practice on a piece of paper to ensure it comes out next to perfect.
- While you let the marshmallows dry for a bit, wash all your fruit and cut them into little bite-sized cubes. Keep in mind we will be putting these on the wooden skewers, so cut to scale.
- Once you are ready, begin to stack a strawberry, a piece or two of melon, and a ghost marshmallow until you get to the top. Just make sure you keep a bit of room on the bottom for you to hold it.
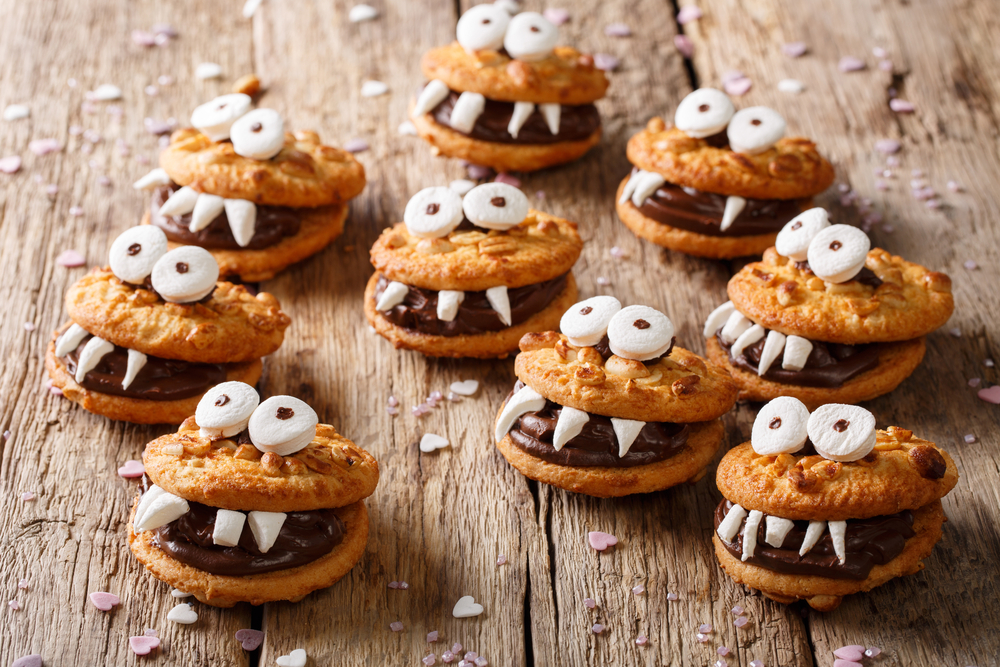
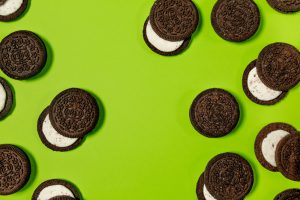
Pumpkin Oreo Pops
Everyone always likes a little something extra to celebrate a certain time of year. If it is Christmas, we love a cookie in the shape of a Christmas tree and egg-shaped if we celebrate Easter. Well, Halloween is no different. The concept of trick-or-treating can be questionable this season, and that may mean some kids are looking for a bit more excitement to make up for the highly anticipated night.
So if you are looking for something fun to do and a way to spend quality time with the children, there is an awesome Pumpkin Oreo Pops recipe from “Tastemade.” Acting as a lollipop, this awesome mixture of one of the best cookies and dark chocolate make the perfect mix and pass the test for presentation and taste.
Another reason that these pumpkin pops are so awesome? They can be wrapped up and given as presents or taken on the go. Trust me; if I did a drive-by hello to my niece and nephew, they would be ecstatic to see those. Just make sure you make enough, so you are ready when people ask you for more (feel free to share this recipe with them if you don’t want to plan on baking for the rest of the Halloween season).
To create this wonderful and delicious masterpiece, we are going to need a package of sandwich cookies (doesn’t matter which brand), orange and green candy melts, lollipop sticks, edible eyes (this makes it fun), dark chocolate, small pretzel bites, a skewer, and a pair of tweezers. Got all that? You may want to put your mask on and head to the store or go online real quick. Let me know when you are ready, and we will begin!
- First, melt your dark chocolate in your Sharp Microwave Drawer by putting it in for 15 seconds intervals until it is smooth.
- Next, take both ends of the sandwich cookie and put them apart, separating them. Lay them out and separate them, one with the cream-side (yum) and those without it.
- Practice the same process you followed in Step 1, except this time; you will melt the orange and green candy melts.
- Once the candy melts are melted, take a lollipop stick and dip it into the orange melt. After that, place it on the cream-side of the cookie.
- Next, take the second half of the cookie and press it firmly. If you are strong and break it, use some of the melted candy melts as glue to put it back together. Leave it for about 15 minutes and give it time to harden up.
- While the cookies are drying, we are going to get decorative. Please take out the pretzel bits and dip them into the green candy melts. Using tweezers is ideal. Set up a piece of parchment paper and let them firm up for a bit.
- By now, 15 minutes should have gone by, and your cookies should be ready. Dip the whole cookie into the orange candy melt and lay them onto a tray lined with parchment paper.
- Please take out the edible eyes, place them onto the newfound orange creation, and use the green pretzel bits to replicate a stem (it’s all in the detail).
- Finally, take the skewer’s end and dip it into some melted dark chocolate and gently use it to zig-zag across the face of the pumpkin. If you don’t feel comfortable, you can always outline the pumpkin, make a little face, and personalize it to be your own. Let it firm up for a bit and enjoy it!
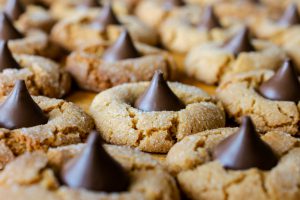
Pumpkin Blossom Cookies
When I first saw this recipe, my reaction was with great joy as it reminded me of times when I was younger, and my grandmother used to make something very similar. I remember them being delicious, and I couldn’t keep my little hands off them at the time (okay, I’ll admit it, I still can’t). Growing up near the ocean, we would go out on my grandparents’ boat during low tide, all bundled up in our fall gear. About halfway through the boat ride, she would bring out the bags of cookies, and I was as happy as six-year-old me could me.
Guess what? You could make your kids that happy too. This awesome recipe from “The First Year Blog” calls for pumpkin blossom cookies. The soft filled feeling with every bite is really something to look forward to and give everyone in the house something good to talk about (and munch on).
Check your cabinets before you head to the store and look for an egg, a stick of butter (1/2 cup), a package of spice cake mix (15.25 oz.), room temperature cream cheese (4 oz.), sugar, pumpkin spice kisses, and pretzel sticks.
For the buttercream, we will need enough ingredients to make a small batch. This includes 2 tbsp of butter, a 1/4 cup of powdered sugar, and green food coloring. There is no better way to begin than to do it and begin.
- First, we are going to begin by taking out all the ingredients. Grab the kisses and cut off the tippy tops of them (this will help the design). Please place them in the freezer to cool them down a bit, helping them keep their shape.
- Next, grab a mixing bowl and beat the eggs, butter, and cake mix, combining them. Once combined, add and mix in the cream cheese—freezer the whole dough for about 30 minutes.
- While you are waiting for the dough to cool down, we are going to make the buttercream. In a new mixing bowl, smoothen out the butter. Then add in the green food coloring and powdered sugar, combining them. Transfer it to a piping bag (or a Ziploc one if you don’t have one).
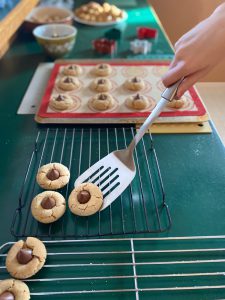
- Preheat your own to 350º F and take the dough out of the fridge. Form them into little balls (a cookie scoop would work perfectly) and roll them into a bowl of sugar. Place them on a baking sheet lined with silicone. Gently flatten the tops of the bowls and bake them for approximately 8 minutes.
- Finally, take the cookies out of the oven and let them cool down for about 2 minutes, and then take the frozen kisses out of the fridge, placing them on the top of each cookie. On the top of the kiss, use the piping bag to create little vines on the pumpkin and place the broken pretzel stick to serve as the stem. Enjoy!
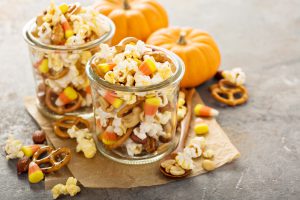
Monster Munch Mix
It is crazy how quick the month of October and the whole Fall season flies by. One weekend it’s shopping for your Halloween costume, one-weekend apple picking, the next pumpkin picking; it sometimes seems that you can never have enough time just to sit still. While I do like partaking in amazing fall activities, one of my favorite things about the month and the season is the awesome movies you can watch.
Whether it is on TV or your favorite subscription service, I enjoy an array of Halloween centric films. From the haunted movies about witches to the classics, sometimes there is nothing better than sitting inside on a nice and cool fall night under a blanket watching a fan favorite. But what are we missing? The go-to movie snack, that’s right, I am talking about popcorn!
This, however, is popcorn reimagined. It’s not as crazy as it sounds; hear me out. This has been dubbed as the “ultimate Halloween treat” by Simply Delicious Foods calling for a monster munch mix. There is not much to it. I’ll walk you through it as it won’t take you longer than 11 minutes to put together.
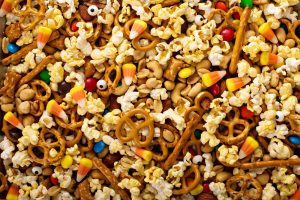
To start, pop some Orville Redenbacher’s® popcorn in the Sharp Stainless-Steel Carousel Countertop Microwave Oven. This is super easy to do given the preset settings, allowing it to be the perfect taste and crisp with just the button’s press.
Head on over to your local convenience store, or if you want to follow the #SharpStayAtHome motto, you can easily order all these online and have them delivered to your home. In addition to the popcorn, grab a cup of pretzels, peanuts and raisins, M&M’s, and a bunch of Halloween candy. These are just suggestions! The coolest thing about this is you can adjust these to your preferences. Not the biggest fan of raisins? No biggy swap them out with peanut butter cups (my favorite) or your other favorite candy.
- Grab a large bowl and pour in all your ingredients. Maybe combine in intervals, swapping between popcorn and candies to make sure each handful gets a delicious and even bite.
Looking For More? Simply Better Living Has It All!
Still interested in learning about awesome Halloween styled deserts? No worries because Simply Better Living is filled with amazing content. Check out our Spooky Treats for Your Little Ones for more tips and recipes that will help you satisfy your sweet tooth!